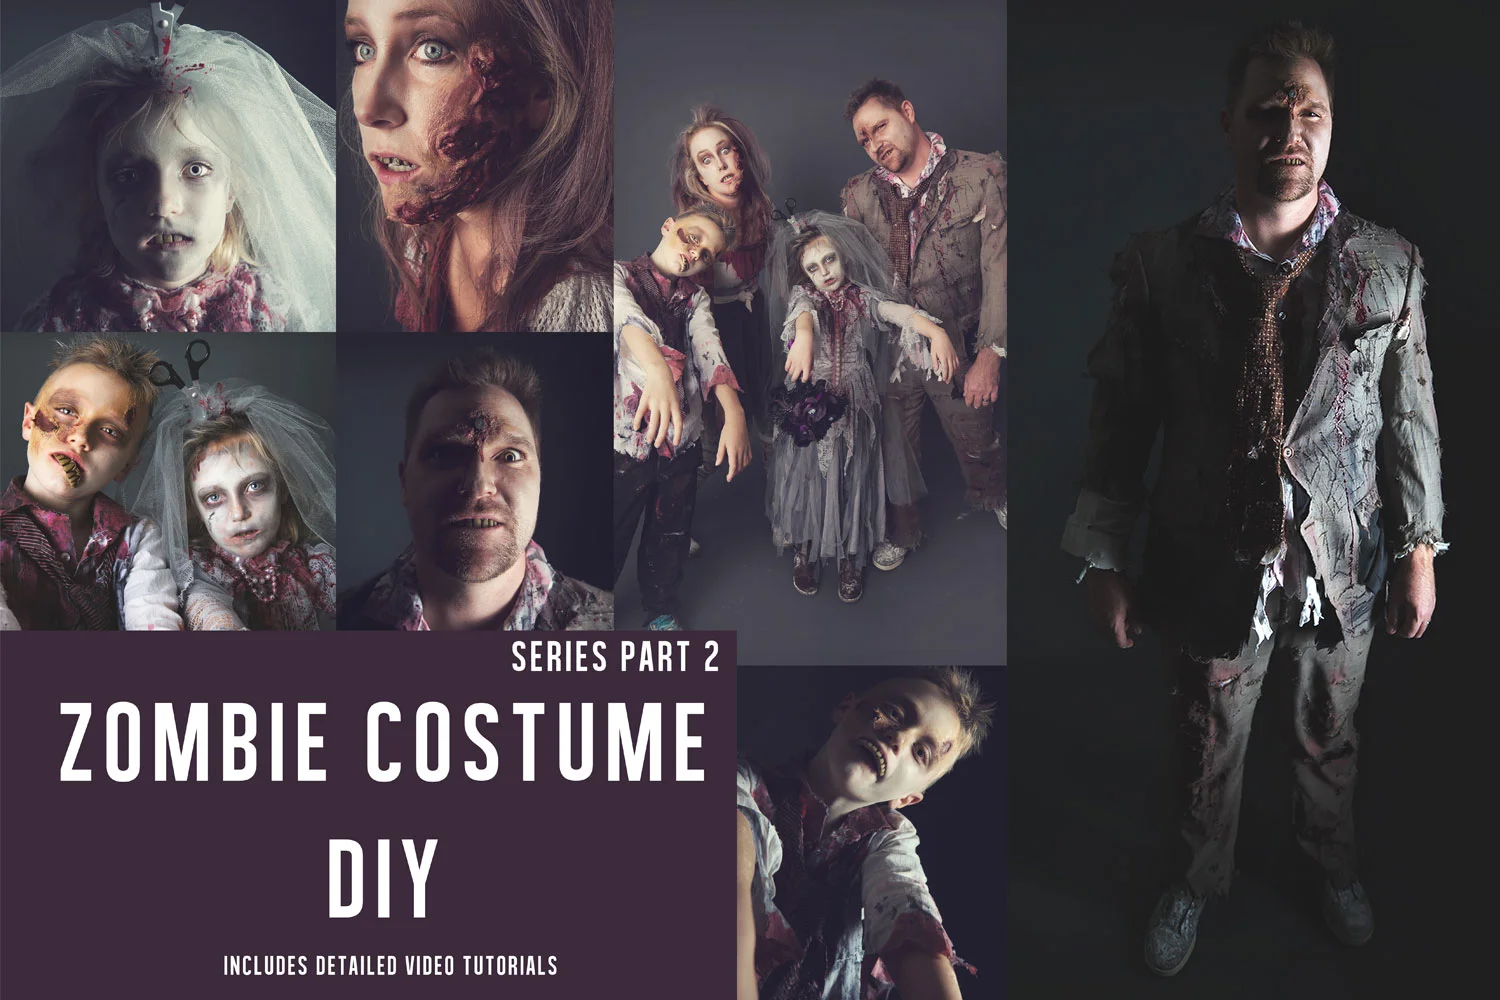
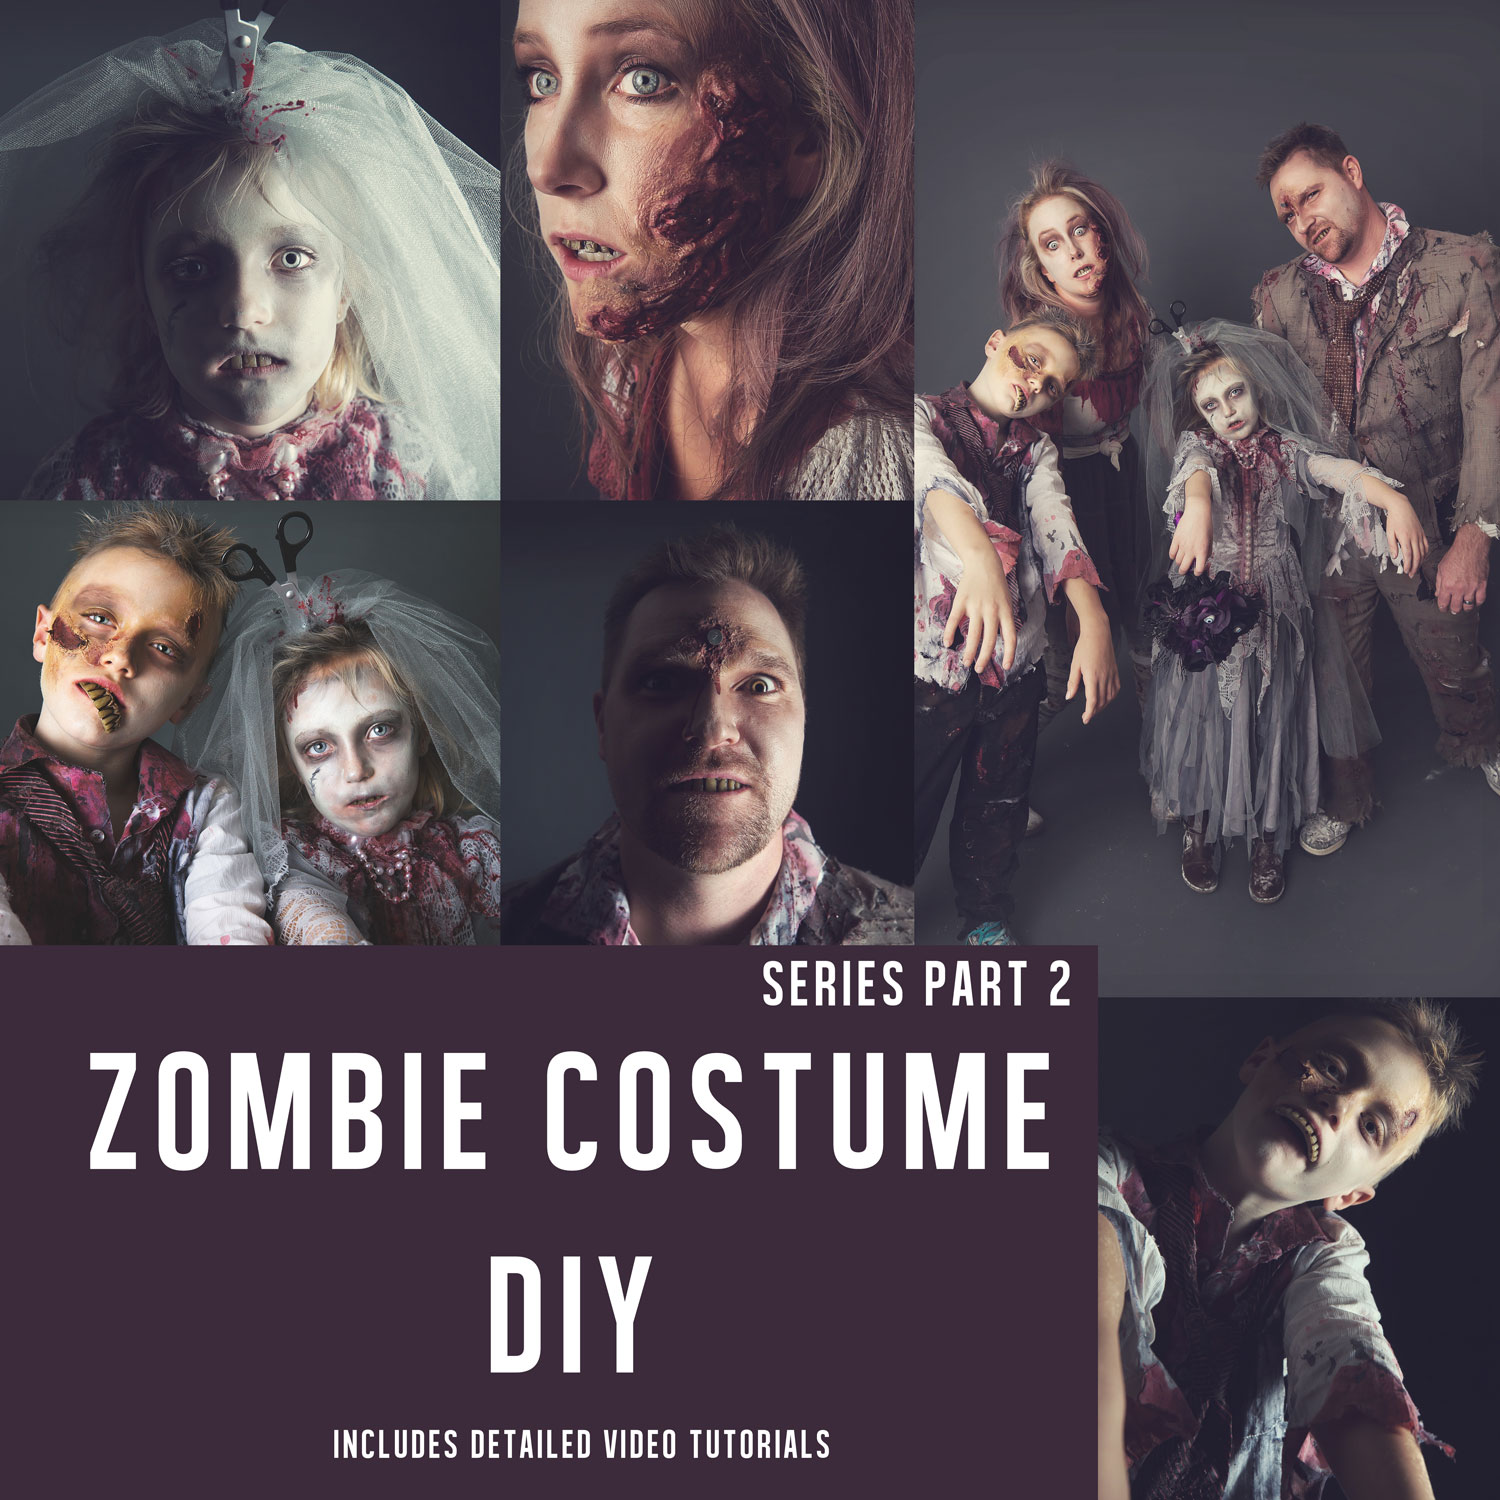
Zombie Costume How-To Part 2
As promised, I am back with Part 2 in the Zombie Costume Series, and here are the behind-the-scenes details about making last year’s Zombie costumes.
DIY it!
When my daughter picked a Zombie theme last year for our annual family costumes, I figured with the Walking Dead at the height of popularity, finding tutorials on making ghostly, murderous, post-apocalyptic costumes would be simple. We live in a Pinterest age after all, right? Unfortunately, after scouring the internet, I found absolutely nothing helpful (except for a 1/2 decent blood recipe…see below).
All of the bigger items that I used, I either bought second hand or re-purposed pieces that I had on hand. There were only a couple of tiny pieces that I purchased new (details below).
Men’s and Boy’s Costume how-to:
Pieces:
Suit purchased used on Kijiji.
Shirts, ties and shoes and boys pants were either pre-owned or hand-me-downs and then re-purposed.
Removeable teeth (bought at Value Village ~ in the “new” section, don’t worry)
Black, Silver and White Hair Spray (also from the “new” section at Value Village)
Aging your Whites and Lights:
I started Project-Zombie-Costume by soaking all of my whites and lights in a bucket full of coffee grounds, old coffee and a bit of warm water. Let sit overnight and rinse with cold, then hang dry (do not wash). Repeat to darken if necessary.


To distress the suit/shirts/ties you will need:
-Sandpaper Block
-Utility Knife
-Cheese Grater
-Scissors
-Fake Blood (dollar store and homemade - recipe below)
-Shoe Polish (brown or black) (dollar store)
-Coffee Grounds and Coffee (used above)
-Bleach in a spray bottle if desired (use outdoors)


I am certainly no videographer, but I figured this would be the best way to show you how to distress the suit.
I had the videos embeded to make things easy, but it turned out it wasn’t easy…it was just SLOW…So I will pop the links here to the videos. There are three and they go in order from start to finish with the suit jacket. Afterwards I repeated the process on the other pieces.
Zombie Costume Tutorial Video #1
Zombie Costume Tutorial Video #2
Zombie Costume Tutorial Video #3
As I distressed the items, I threw them through the washing machine a few times, to help encourage fraying and mis-shapeness. This will pull apart the edges, making the tears, and cuts look old and worn. The suit I bought my husband was cheap but too narrow in the shoulders, and so I added extra cuts and pulls in the armpits and across the broadest part of the back to give him more room and stretch as it frayed.
Next up, the “dirt”. I opted for cheap dollar store shoe polish (both with a foam applicator and also in wax). The foam applicator made it quick and easy to dab on the edges and rub into the holes. I used a rag and brush with the wax-type and rubbed it lightly into the areas that I had scored with the utility knife.
I would have preferred dark brown but I wasn’t willing to spend more to buy it elsewhere. If you find a cheap brown polish, grab it. Quite honestly though, black works well enough, so it isn’t worth the extra money to hunt down a better quality brown.
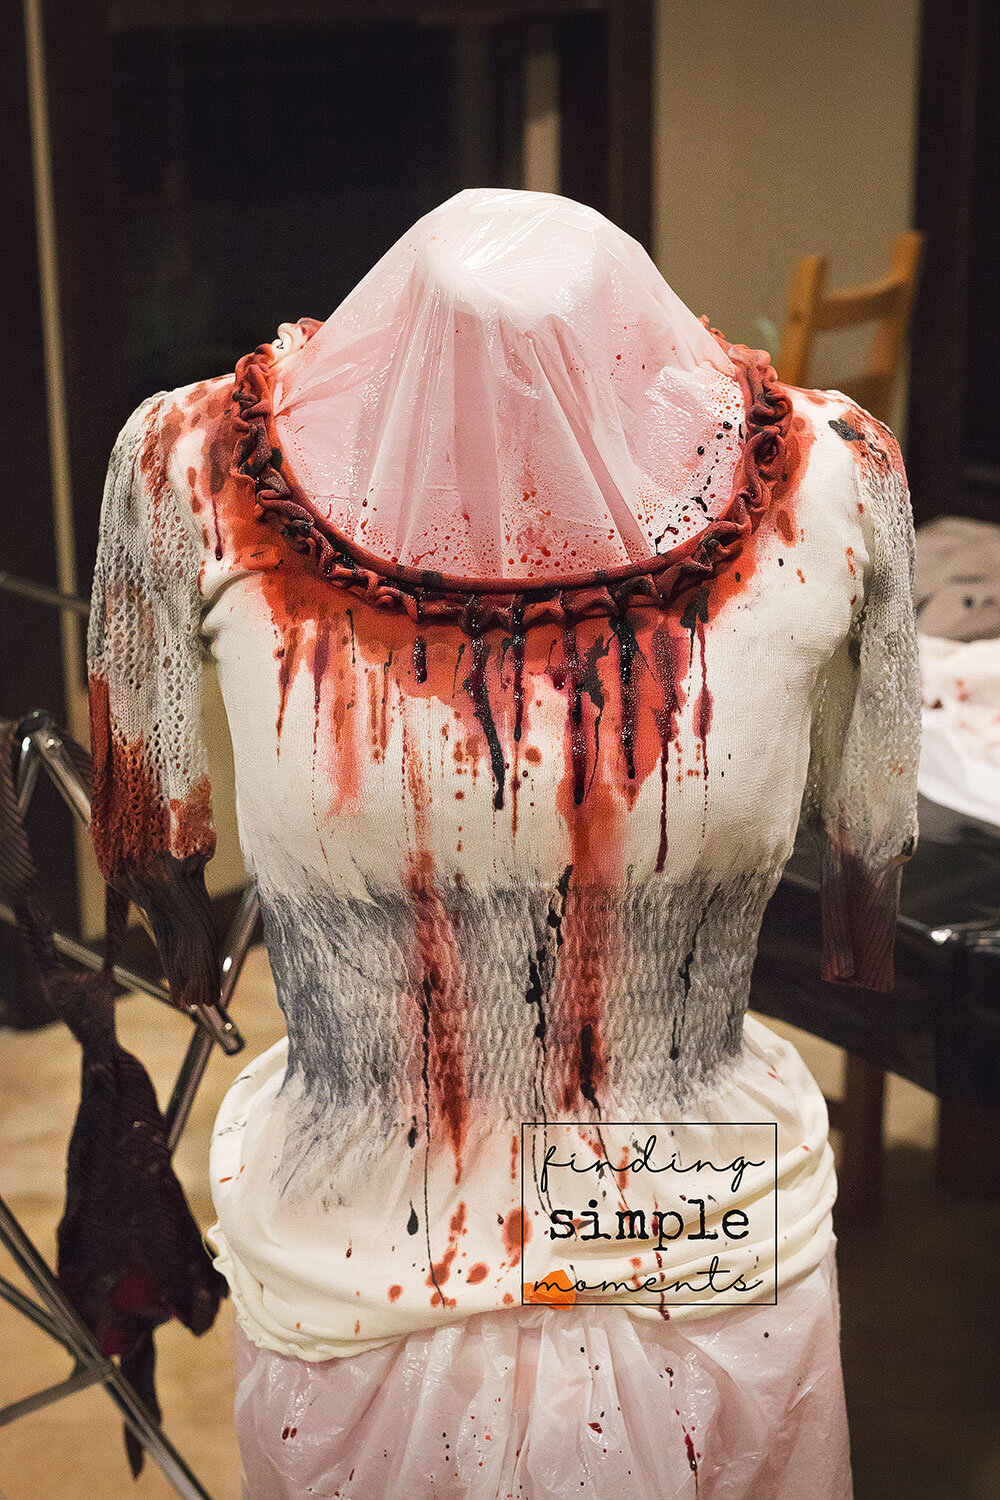
Now comes the blood. I didn’t want to spend a lot of money on fake blood (you can get really good quality blood artist stores, but I wanted to stick to my budget and just brought a few poor quality spray-on’s at the dollar store and Value Village (in the photo above). One went on bright pink and the other completely black. Ew. Not at all what I was going for, but I decided to use them anyways, and splattered them everywhere planning to use them as depth behind the homemade blood. For the most effective blood, I made it in the kitchen (and then layered it on top of the crappy pink and black stuff).
Ideally apply the homemade blood at least 48 hours ahead of time to allow drying time. Mine was applied the night before and it was still a bit tacky the following day.

Blood Recipe via Under a Cherry Tree:
Ingredients:
8 tbsp light corn syrup
1 tsp cocoa powder
1/4 tsp cornstarch
1-5 drops blue food coloring (I used more)
1 tsp + 1/2 tsp red food coloring (I used more)
1. Blend cocoa, cornstarch and corn syrop together.
2. Add blue then red food colouring (I used cake decorating colour paste to make them richer and deeper)
3. Add more colour. Once it dries it fades a bit, you will want it to be deeper in colour than you are anticipating.
4. Once you test, you may want to add a dot of black cake decorating paste (recipe didn’t call for it, but I liked it this way).
Blood Droplet Tip:
I put my costumes on a sewing dressform to drop the thick blood on with a spoon to make it “drip” in a realistic pattern, but hanging them on coat hangars would also work well. This is an ideal part of the project to execute outdoors, since the rich and sticky colours could easily stain flooring.
Ladies and Girl’s Costumes:
Pieces:
Dead bride costume and ladies tulle skirt (Kijiji)
Veil with scissors (handmade)
Lacey top, leggings (pre-owned)
Leg wraps for leggings (handmade)
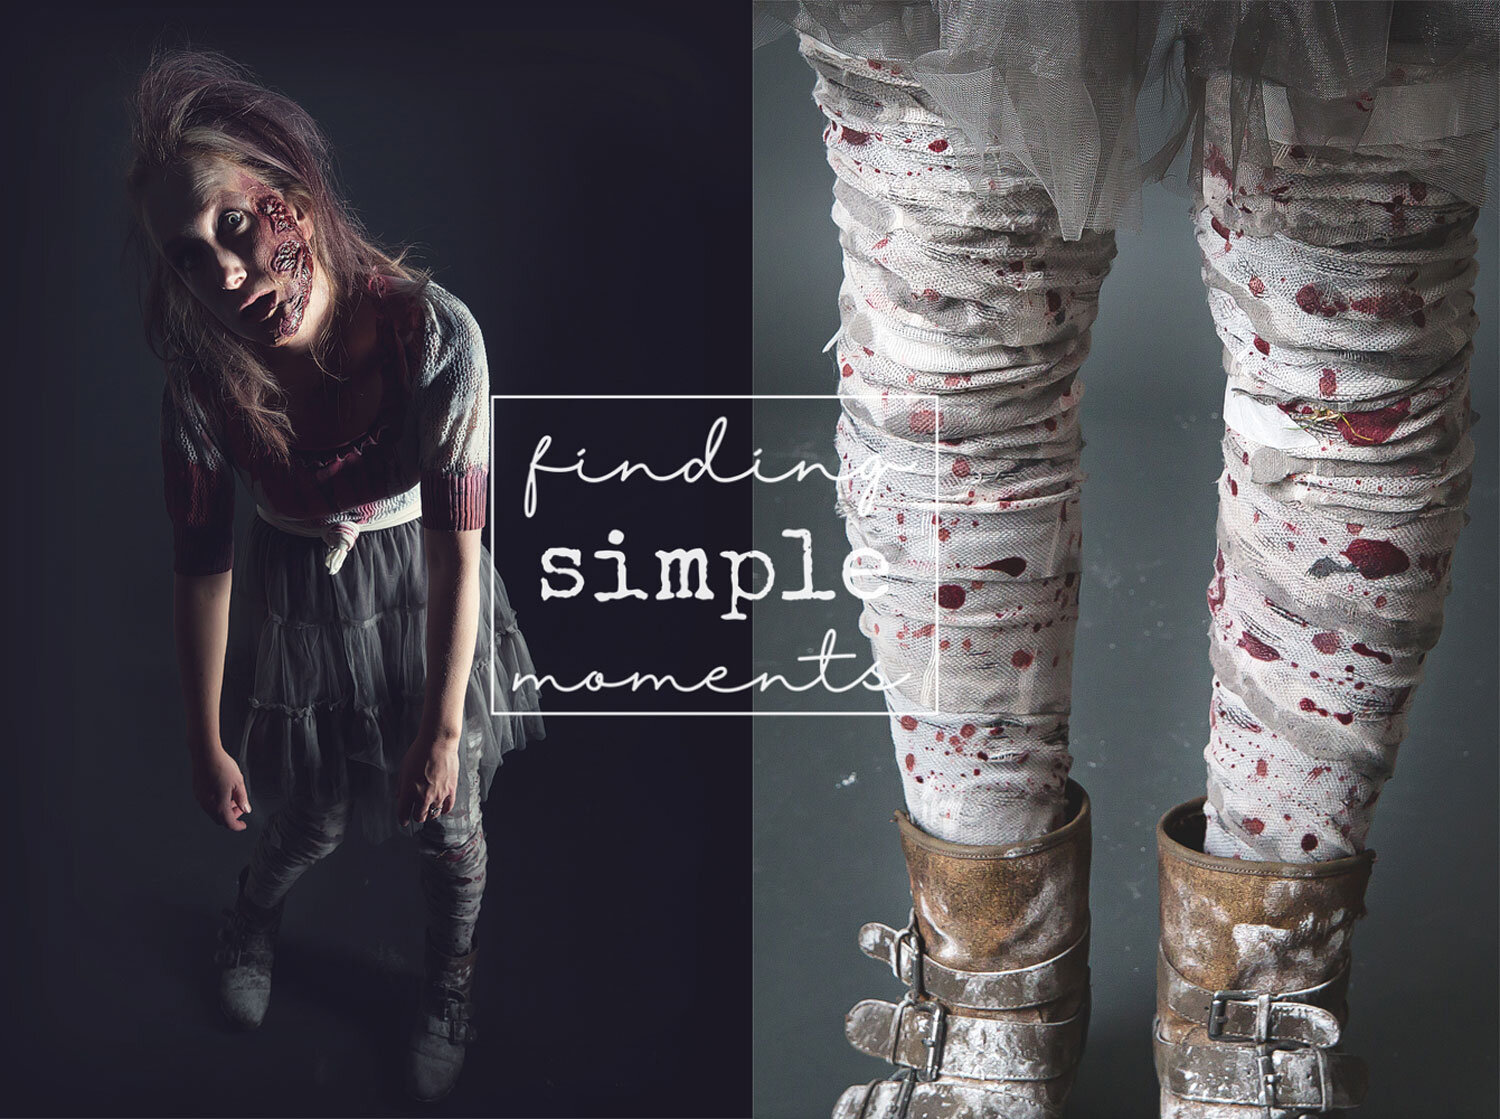
Bandage Leggings:

These were one of my favorite pieces. I didn’t have any roller gauze, and so I ordered this on Amazon. (Not an affiliate link, just showing you what I used).
I used 6 rolls and popped the rest into my first aid kit and the trailer for emergencies. It is decent quality and stretchy enough to stay up without a fight.
First, I soaked it in coffee and coffee grounds just like I did with the boys shirts. (To age them).
Secondly, after rinsing and drying, I used shoe polish along the edges (the liquid one with the foam applicator). Allow drying time.

As the shoe polish died, it soaked in a bled into the grain of the fabric, lightening it and mixing it in.
Next I pulled and stretched using my fingers all the way along the gauze the cause flaws and imperfections.
Lastly I hung the roller gauze over my drying rack, and sprayed with the two types of dollar store blood as well as dropping the homemade blood here and there.

Once they were fully dry I put a pair of my own fleece leggings on and wrapped my legs in the gauze. I secured them in place with big safety pins.
Ladies Top and Skirt:
I didn’t do much too these pieces. The top was made of synthetic fabric and I knew that it wouldn’t take the colour of the coffee (above), so I distresses it a bit with shoe polish and used blood all over it. I didn’t bother to put any blood on the skirt, I just dusted it with a bit of cornstarch to age it without ruining it.
Veil:
Not too much exciting to report here. I bought 2 meters of grey tulle, folded it and hand sewed it to a hair comb. You can find DIY hand-sewn and no-sew veils on YouTube and Pinterest, so I won’t waste your time with that tutorial here. I attached the scissors from a zombie headband (did not use the headband) that I bought for $3 at Value Village (attached with crazy glue). I have also seen the same scissors on Amazon and the Halloween Store, but I think that Value Village had the best price.

Bride’s Dress:
The dress was purchased second hand on Kijiji and was already grey and so all we did was add blood.
Bridal Bouquet:
When walking around the Dollar Store looking for inspiration, and came across these eyeball flowers that came in purple and black (with spiders). With a little hot glue, some wire cutters and glittery purple ribbon, we had a “killer” bridal bouquet.
FYI: I have actually checked, and Dollarama seems to be carrying them again this year.

Shoes:
Unfortunately I do not have a great photo of the shoes, but aging them was easy. I didn’t want to wreck perfectly good shoes, so I didn’t distress the fabric at all. I just sprayed them with hairspray and while still wet (so do them one at a time), I dusted them with cornstarch and then sprayed them again. I wouldn’t recommend doing it to your favorite shoes, just in case it causes damage, but all four pairs went through the washing machine afterwards and came out as good a new.
Make Up:
Disclosure: For those of you who don’t know me, I am a bit of a control freak. {Insert husband nodding at me from across the room}. I want to do it all myself.
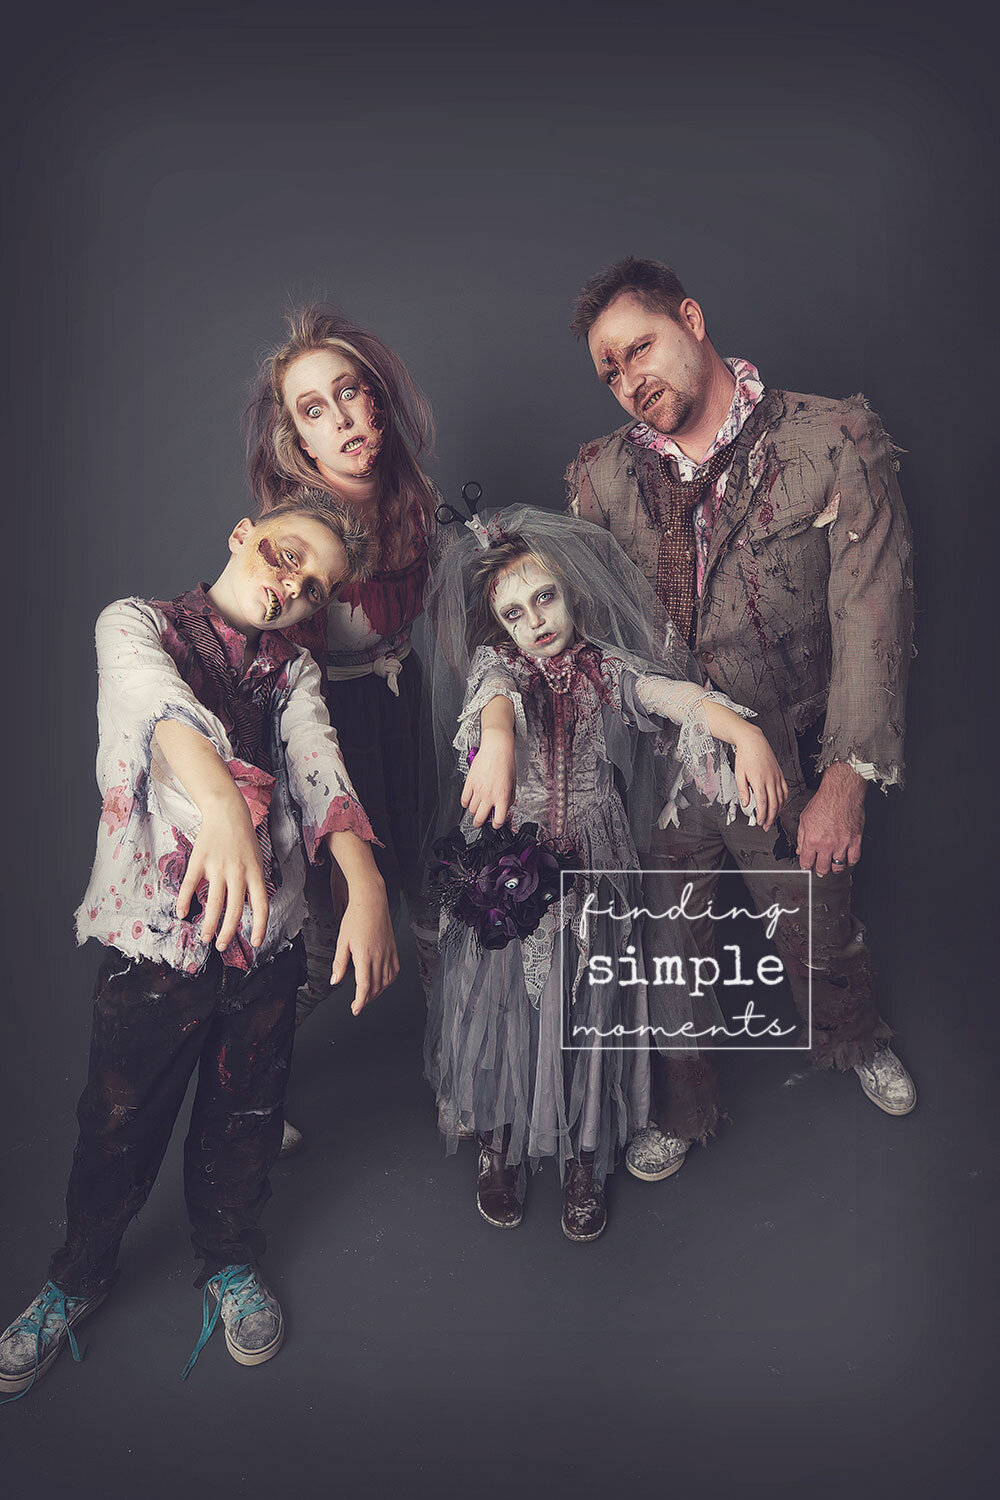
When it came to the makeup, I researched a ton of DIY tutorials, and realized that it would take hours to do what I had my heart set on, and if I tired, I would be miserable and completely unpleasant to be around. In the end, I relented and hired a girlfriend’s 16-year-old daughter (and aspiring make up artist) to do it for us. Yes 16! She was ah-mazing!!! To be honest, I can barely put regular make up on myself, much less latex prosthetics. I couldn’t have possibly done this great of a job. I sent her many Pinterest images, and came up with the idea of the nail sticking out of my husband’s head and the chemical burn on my face. My son wanted to look like his face was decaying/peeling off and my daughter didn’t want any prosthetics or anything that “would feel too weird when I talk”, so she opted just do plain grey with stitches. Man, did Miss Eva ever do a killer job. I totally recommend outsourcing this part, especially if you are doing a whole family and still want to enjoy the experience! If she gets together a Facebook page or website, I will add the link for you guys.

I hope this helps inspire you if you are making your own costumes. I am a total procrastinator and left most of it to the last minute, but was still able to pull I together. If I can do it, you definitely can.
Send me your photos. PLEASE!
Happy Halloween-ing! I need to stop typing and get back on my last minute prep for this year. If you have any questions, drop me a note in the comments and I will do my best to get back to you quickly.
~Q
Once again a huge thank you to my brilliant friend Lynn over at Travel Thru Lynn’s Lenses. She kindly took photos on my camera for me and let me edit them as I saw fit. I owe you one my friend!